If you are getting ready to move out of a rental property in Brisbane or the Gold Coast, a bathroom exhaust fan is one of those easy-to-overlook spots that property managers and landlords tend to notice right away. After months or years of use, these fans collect an impressive amount of dust, lint, and grime that can cost you part of your bond if it is left unattended.
The good news is that cleaning a bathroom exhaust fan is not nearly as complicated as it looks. With the right approach and a bit of patience, you can get it looking presentable again without breaking anything or calling in a tradie. This guide walks you through the whole process, from a quick vacuum clean to a full cover removal and wash.
Table of Contents
ToggleWhy Bathroom Exhaust Fans Get So Grimy
Bathroom exhaust fans work by sucking humid, warm air out of the room. In doing so, they also pull in dust, hair, skin cells, and whatever else is floating around in the air. Over time, all of that debris builds up on the grille cover and inside the unit itself. In households where hairspray or dry shampoo is used regularly, the build-up can become almost glue-like because the spray particles coat the dust and bond it to the plastic.
The fan blades and motor housing behind the cover can be just as bad, sometimes worse. Once you take the cover off for the first time in a while, do not be too shocked by what you find in there. It is completely normal, and it is fixable.
If you have a range hood in the kitchen that also needs attention before your exit inspection, our Ultimate Guide to Cleaning Range Hood Filters walks through the full process.
What You Will Need
Before you start, gather the following items so you are not running back and forth mid-clean. You will want a vacuum cleaner with a brush attachment, a soft-bristle brush or an old toothbrush you do not mind dedicating to cleaning, a bowl of warm soapy water, a few clean dry cloths or microfibre towels, and optionally a plastic card or pry tool if the cover looks like it might be painted over or stuck to the wall. A torch or the light on your phone will also come in handy once you remove the cover.
Step One: Start With the Vacuum Before You Touch Anything
The first thing to understand about a dusty exhaust fan grille is that any movement will dislodge the dust and send it flying everywhere. Before you start wiping, poking, or pulling at anything, grab your vacuum cleaner and use the brush nozzle attachment to suck up as much loose dust as possible right where it sits.
Run the nozzle across the grille in slow, even passes. Extend the vacuum wand if the fan is on the ceiling or higher up on the wall. This first pass alone can make a noticeable difference, and for lightly soiled fans it may actually be all you need. Once you are happy that the loose dust has been removed, step back and assess whether the cover needs to come off for a deeper clean.
Step Two: How to Remove the Fan Cover
Most bathroom exhaust fan covers in Australian homes are not screwed into place. They are held up by a pair of spring-loaded metal wire clips that slot into the housing. Once you know how they work, removal becomes straightforward.
Start by gently pulling the cover straight out from the wall or downward from the ceiling. You do not need a lot of force. Pull it out just a few centimetres and you should feel it give slightly. Once it is pulled out, feel around the inside edges for two thin metal wires, one on each side. These are the spring clips. They are usually V-shaped or bent into a loop at the top where they attach to the cover. To release the cover, squeeze both clips inward at the same time and slide them out of their slots in the housing. The whole cover should then come free.
If the fan has been in place for a very long time, or if previous tenants or owners painted over the edges, the cover may be a bit resistant. In that case, run a plastic card or a non-metal pry tool gently around the rim before you attempt to pull it out. This breaks any paint bond without chipping the surrounding wall or ceiling paint, which is exactly the kind of damage that can count against your bond.
One important caution: the plastic on older fan covers can become brittle over time. Do not rush. Rushing this step is one of the more common DIY cleaning mistakes that cost Brisbane tenants their bond refund, so take your time and work carefully. Work slowly and apply even pressure. If you feel the plastic flexing a lot rather than the clip releasing, stop and try approaching it from a slightly different angle. Cracking the cover will not help your bond return either.
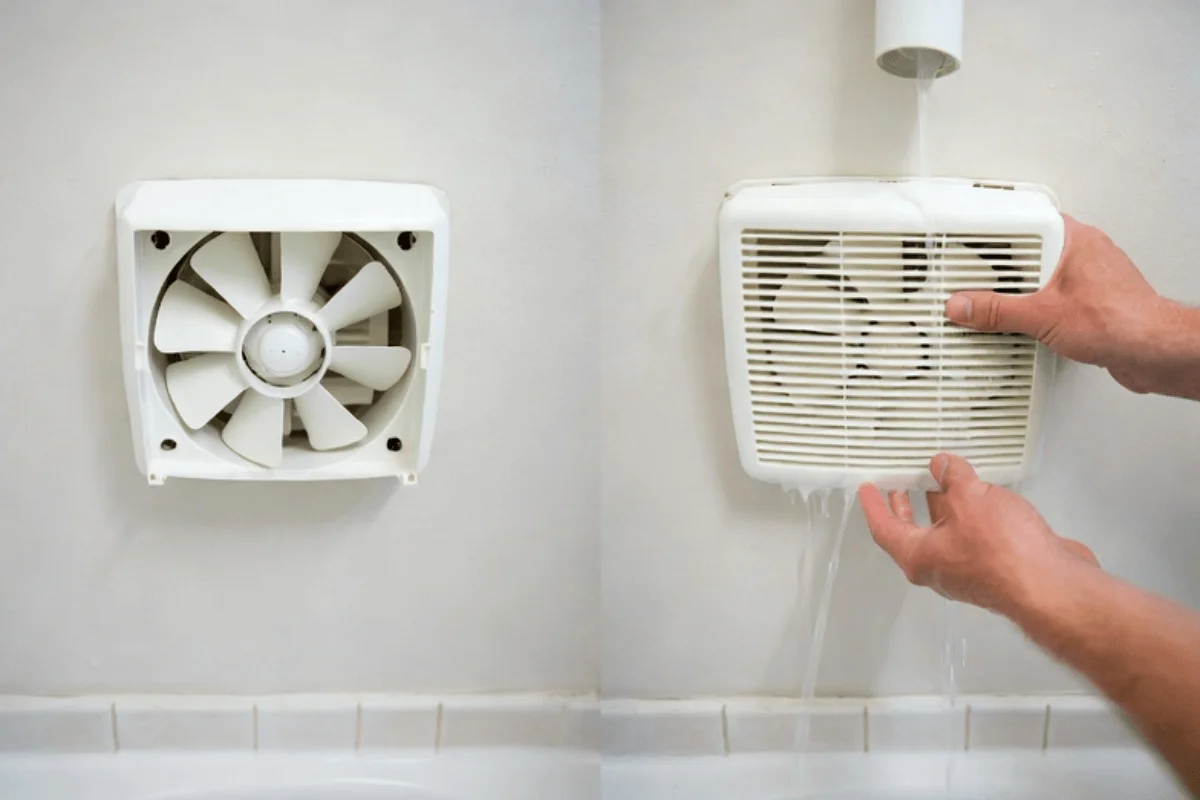
Step Three: Washing the Cover
With the cover off, take it to the bathroom sink or laundry tub. Fill the basin with warm water and a squirt of dish soap. If the cover has years of dust and grime caked into it, let it soak for ten to fifteen minutes. This softens the built-up debris and makes it much easier to scrub away without having to use excessive force.
Use a soft-bristle brush or an old toothbrush to work the soap into the grille slots. Dip the brush into the soapy water and scrub in short strokes, working through each slot methodically. For covers with heavy soiling from hairspray residue or cigarette tar, you may need a few rounds of scrubbing and soaking before the surface comes fully clean.
Some people run their fan covers through the dishwasher on the top rack. It does work surprisingly well for plastic covers that are not too fragile or discoloured. However, check that the cover is not already warped or stressed before putting it through a hot wash cycle. If you are not sure, stick to the hand wash method.
If the plastic has yellowed and you want to restore a bit of the original white colour, some people have had good results soaking the cover in a diluted hydrogen peroxide solution, using the type sold as hair colour developer at chemists and beauty supply stores. This is not guaranteed to work on all plastics, but it can help on covers where the yellowing is due to oxidation rather than staining.
Once the cover is clean, rinse it thoroughly under running water to remove all soap residue. Lay it flat or prop it upright and allow it to air dry completely before putting it back. Putting a wet cover back over the housing can encourage mould growth, which is the last thing you want.
While you have your cleaning supplies out, it is also worth checking the grout lines in the shower and floor tiles. Our guide on how to deep clean grout for bond cleaning in Queensland bathrooms is worth reading before your inspection.
Step Four: Cleaning Inside the Housing
With the cover off, you will now have a clear view of the fan motor and blades inside the housing. This part tends to be significantly dirtier than the cover, and it is worth spending a few minutes on it while you have the access.
Make sure the fan is switched off at the wall before you do anything inside the housing. Use your vacuum with the brush nozzle to carefully vacuum around the motor casing, fan blades, and the inside walls of the housing. Work slowly and avoid pressing hard against any wiring or the motor itself. A soft dry paintbrush can be useful here for dislodging dust from around the blades and in tight corners before vacuuming it up.
Do not use water or wet cloths inside the housing. The motor and wiring are not waterproof, and introducing moisture there creates a safety risk. Dry vacuuming and dry brushing is all that is needed for the internal components.
Step Five: Putting the Cover Back On
Once the cover is fully dry and the inside of the housing has been vacuumed out, it is time to reinstall the cover. Slide the spring clips back into their slots in the housing one at a time. It can take a bit of jiggling to get both clips seated properly. Once they are in, push the cover flush against the wall or ceiling. Give it a gentle tug to make sure it is secure and will not fall.
If the cover feels wobbly or one side is not sitting flush, the clip on that side may not have seated properly in its slot. Pull the cover out again slightly and reattempt. It usually takes just one or two tries to get the hang of it.
What If You Cannot Remove the Cover?
There are situations where removal is not practical or you simply do not feel comfortable taking the cover off. That is fine. You can still do a reasonable job of cleaning the fan without removing it.
Vacuum the grille surface thoroughly first. Then use a dry stiff-bristle brush to dislodge any dust that is stuck between the slots. Follow up with a soft brush dipped in warm soapy water and scrub through the slots as best you can. Wipe everything down with a clean damp cloth, then follow with a dry cloth to remove excess moisture. This will not get the cover as clean as removing and washing it properly, but it can make a meaningful difference to the appearance.
A Word on Bond Cleaning in Queensland
In Queensland, the Residential Tenancies Authority sets out specific cleaning expectations for tenants vacating a property. Exhaust fans are often listed explicitly in exit condition reports, and a dirty or dusty fan grille is exactly the kind of thing that gets flagged during a property inspection. Property managers in Brisbane and the Gold Coast have seen it all, and a neglected exhaust fan is a quick and easy thing for them to point to when disputing a bond refund.
It consistently features in the top mistakes Brisbane tenants make during bond cleans, often because it sits out of eye line and gets forgotten until the last minute
Bond cleaning is about returning the property to the condition it was in at the start of your tenancy, fair wear and tear aside. A bathroom fan that has been properly cleaned and reinstated sits clearly on the right side of that standard. One that is clogged with years of dust does not.
For a broader look at what works and what to avoid during a vacate clean, our Bond Cleaning DIY Hacks and What to Avoid covers the most common pitfalls tenants run into.
If you are feeling uncertain about whether your cleaning efforts will meet the required standard, or if you simply do not have the time to do a thorough job across the entire property before your vacate date, a professional bond cleaning service can take the stress out of the process entirely. Experienced bond cleaners know exactly what property managers look for in Brisbane and Gold Coast rental properties, and they work to a checklist that covers every corner of the home, including those easy-to-forget spots like exhaust fans.
Keeping on Top of It Going Forward
If you have a new rental you are moving into, or you own a home and want to avoid another deep clean like this one down the track, a quick vacuum of the exhaust fan grille every three to six months is all it takes to keep the build-up manageable. A two-minute job done regularly is far easier than a stubborn deep clean done once every few years.
Some people build it into their seasonal cleaning routine. Others do it whenever they clean the bathroom mirror or wipe down the tiles. As long as it happens a couple of times a year, you will never find yourself staring at a fan that looks like it belongs in a before-and-after renovation photo.
Final Thoughts
Cleaning a bathroom exhaust fan before moving out is one of those tasks that feels daunting right up until you actually do it. Once you know how the cover comes off and what to expect inside, it is a manageable job that most people can handle with items they already have at home. The key is to take it step by step: vacuum first, remove the cover carefully, wash it properly, clean inside the housing without using water, and then reinstall everything securely.
Done right, a clean exhaust fan is one less thing for your property manager to flag at the exit inspection, and one step closer to getting your full bond back.
If the rest of the bathroom also needs work, our 6 cleaning tips for a messed-up bathroom in a rented property is a practical place to start.
If you need help with any part of the vacate clean, our team services properties across Brisbane and the Gold Coast and would be happy to take it off your hands.